Instabooks makes it quick and easy to batch edit QuickBooks Online transactions. QuickBooks Online itself only offers batch edit features in the QuickBooks Online Accountant and QuickBooks Online Advanced products, and they come with fairly severe limitations: many properties can't be changed (Class, Location, Vendor), a hard 300-transaction batch limit, and many workflow restrictions on filtering and sorting.
Instabooks supports editing more properties and clarifies the business rules around QuickBooks Online transactions. Filtering, sorting, and batch editing even a thousand transactions is a breeze. This article will guide you through the various concepts and interface features needed to take advantage of batch editing in your daily workflow. For the bigger picture — every native QuickBooks limit and the way around it — see our guide to bulk editing and reclassifying QuickBooks Online transactions.
See it on a live ledger. Try the instant demo — or connect your own QuickBooks free.
Try it instantlyChoose a QuickBooks company
When Instabooks first loads, you will see all of your connected QuickBooks Online companies. If you don't see anything, click the Connect QuickBooks Company button and follow the instructions to add a company.
Click the company you want to work with. This will take you to the Chart of Accounts view.
Choose an account
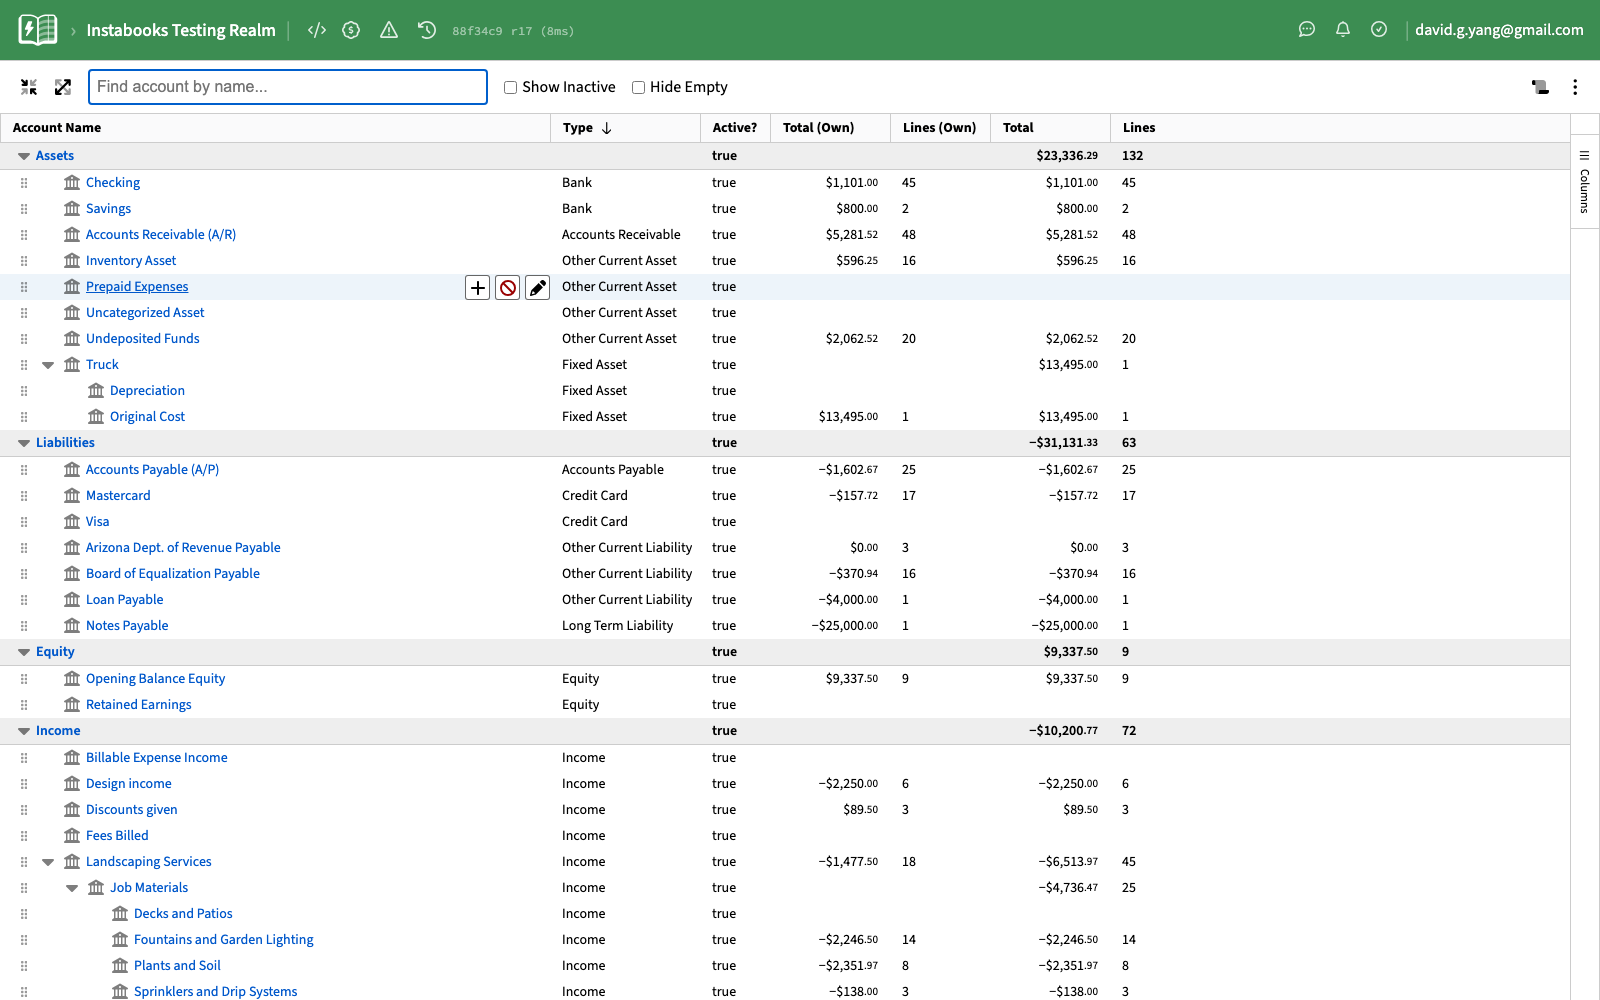
You should now see the Chart of Accounts. This view displays a hierarchical list of accounts from both your Balance Sheet and Profit & Loss categories. From here you can see, rename, create, inactivate, and re-parent accounts.
For now, just find the account containing the transactions you'd like to edit and click on it. This will take you to the Ledger view.
Ledger view: lines, not transactions
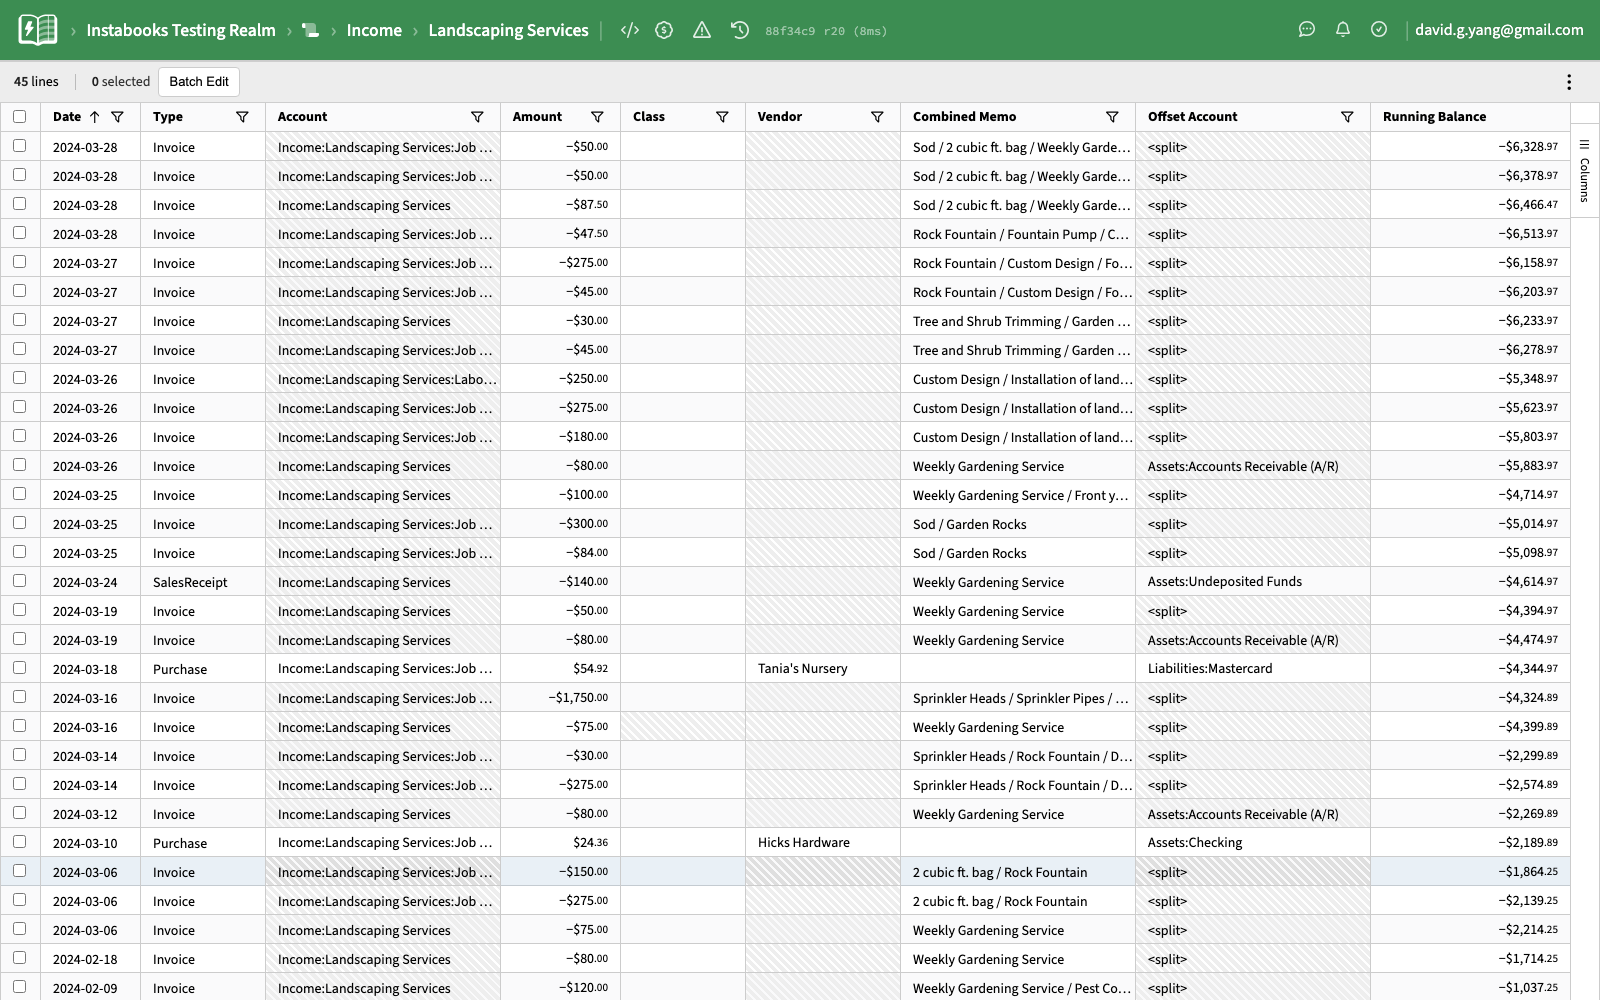
In QuickBooks Online you edit transactions. In Instabooks, the Ledger is a more granular view: rather than showing transactions, it shows the lines of each transaction touching the chosen account. This is because Instabooks always displays a double-entry bookkeeping view of your QuickBooks Online company.
Cross-referencing a line with the underlying transaction matters, so every row has a one-click link straight back to its native QuickBooks Online page.
Filtering columns
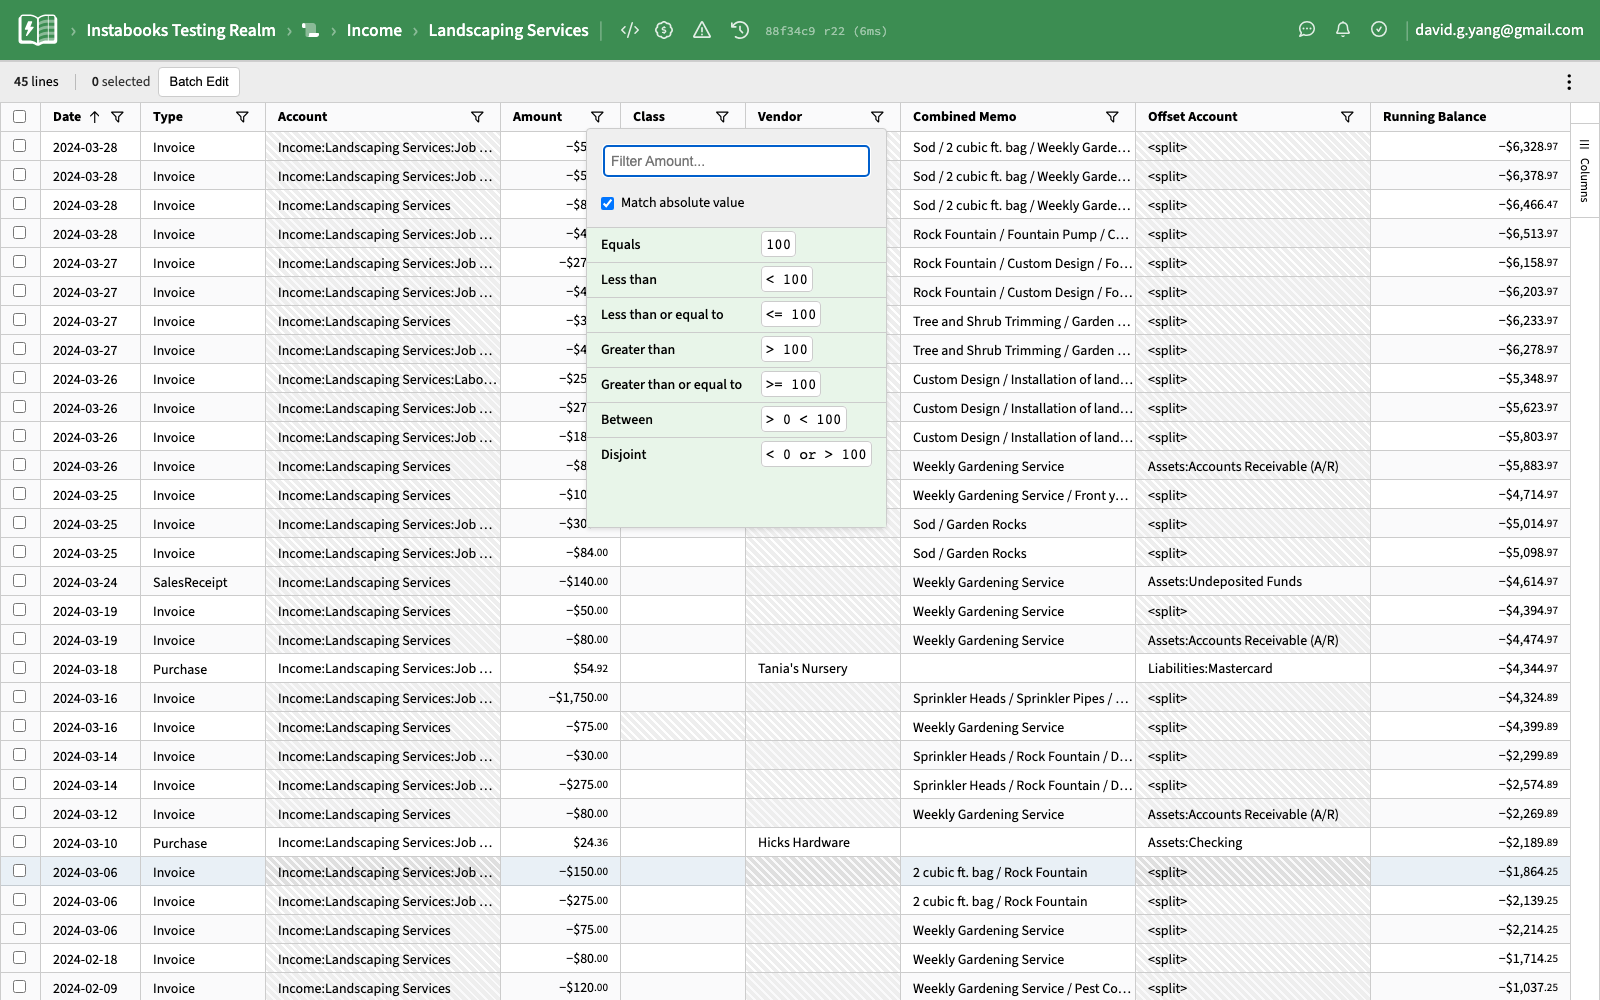
Many column headers have a small filter icon. Click it to open a filter for that column. For example, clicking the filter icon next to Amount lets you narrow to a numeric range or exact value. Other column filters provide the operators appropriate for their data — text contains/equals, date ranges, multi-select values, and so on.
Nearly every column supports filtering. But maybe you don't see the column you're interested in yet. Let's fix that.
Showing and hiding columns
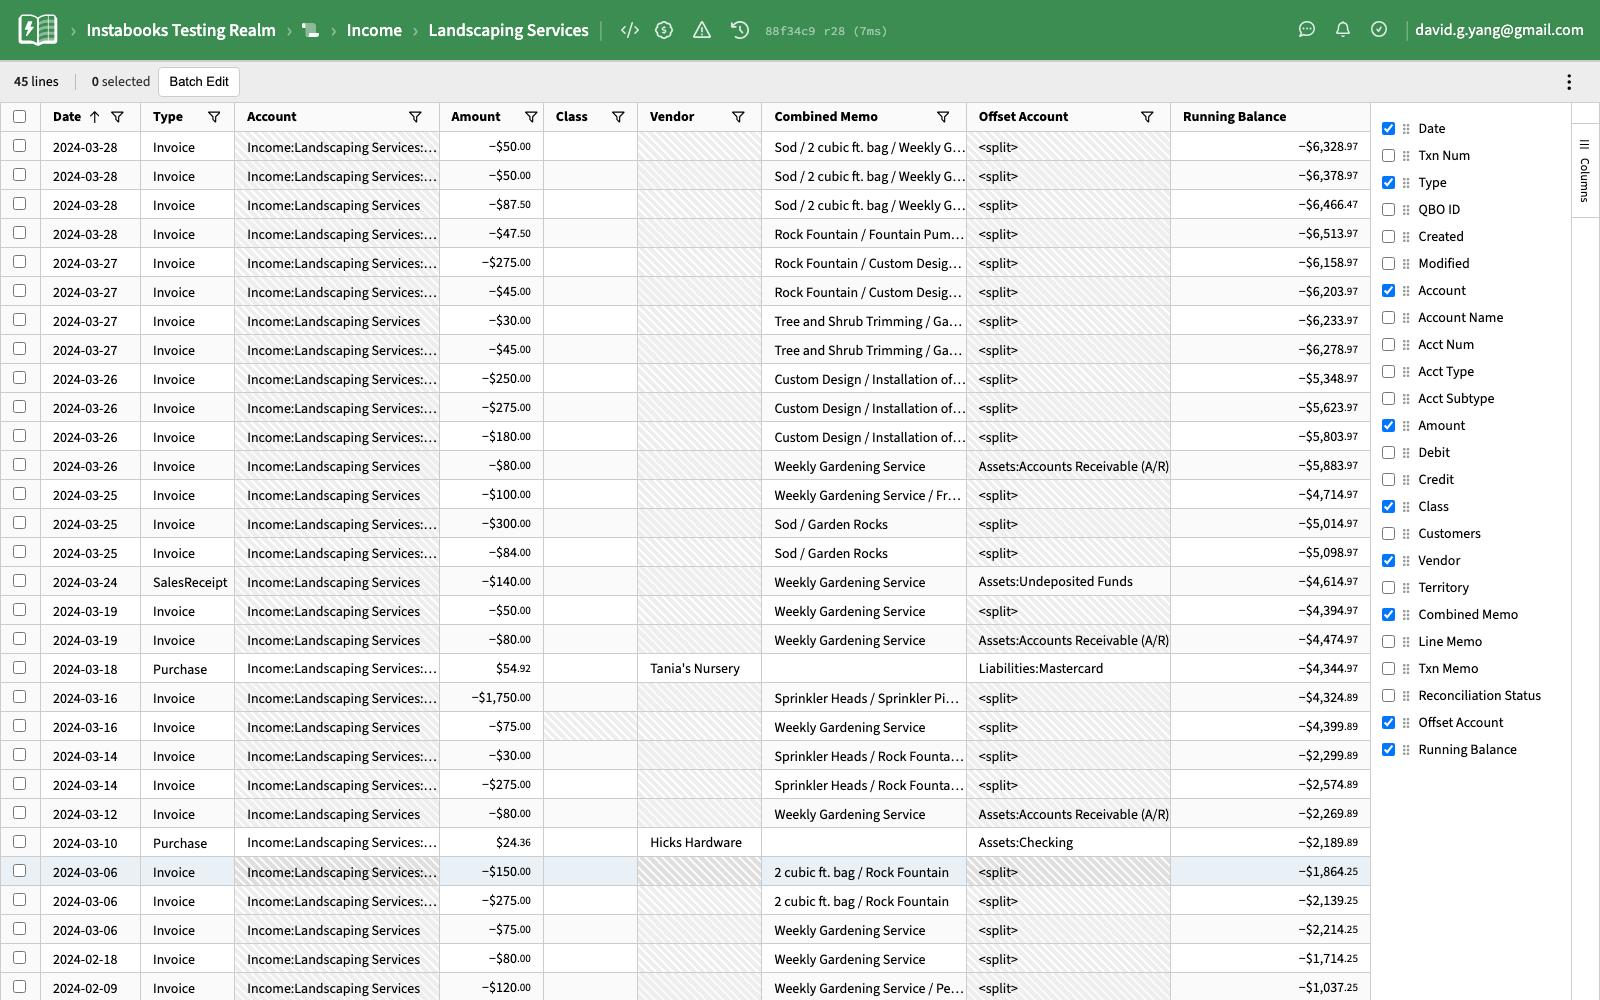
On the right side of the window you'll see a vertical Columns tab. Click it to open the column options. Here you can toggle which columns are visible for this account. Maybe you need to filter by Class, or Customer, or Vendor instead — turn them on, then filter.
Once your account is filtered down to the lines of interest, it's time to select them.
Making selections
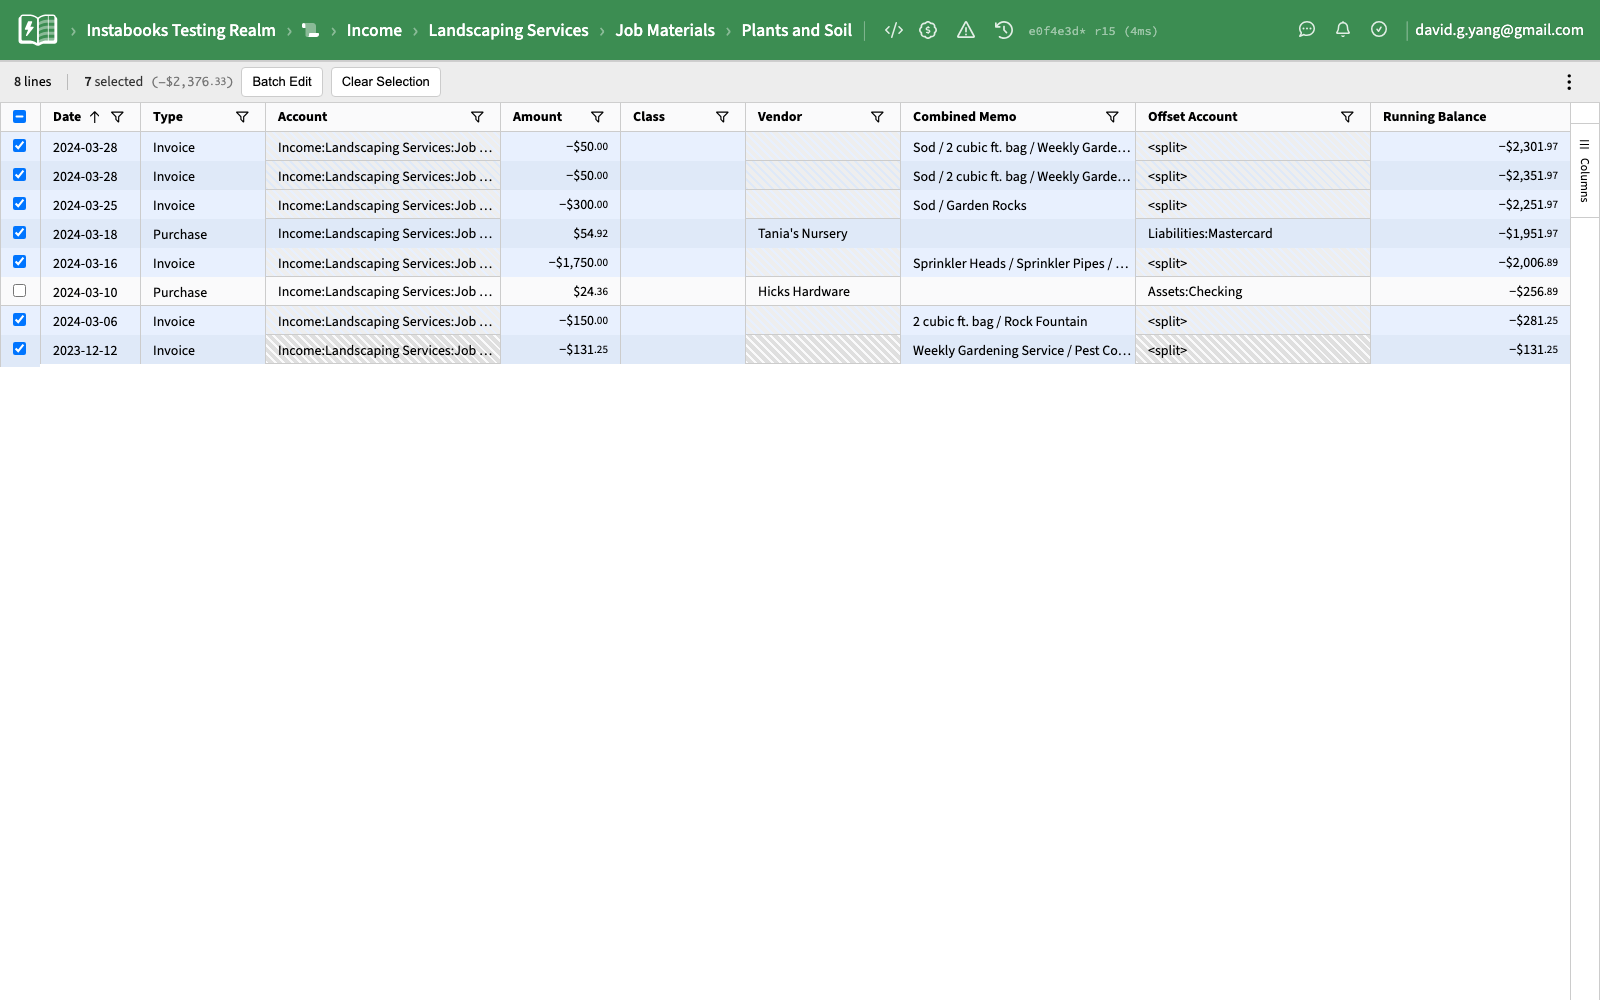
You can select every line in your filtered view with the Select All checkbox in the header. If some lines don't apply, deselect them individually with their row checkbox. Clicking Select All again clears the selection.
Batch editing
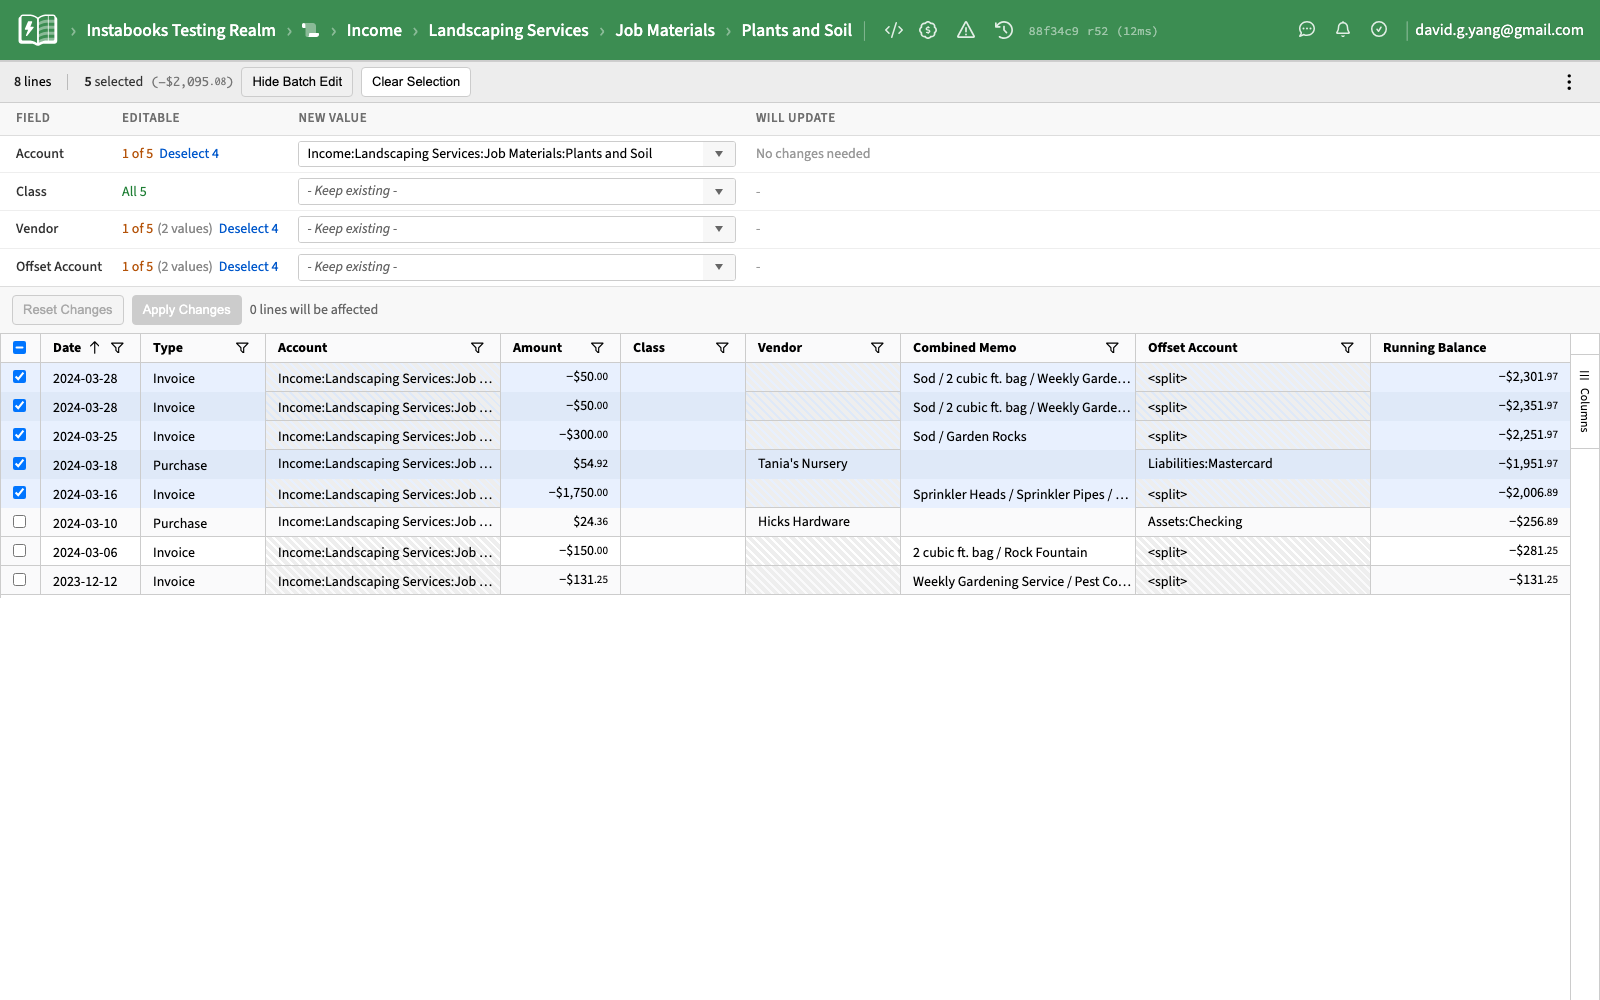
Once you have a selection, the Batch Edit button appears above the ledger. Click it to open the Batch Edit panel.
The panel has a row for each editable property. For your current selection, it tells you how many distinct values exist for each property, and how many of your selected lines are editable. There are a number of situations where QuickBooks Online does not allow editing certain transaction properties; in those cases Instabooks highlights the conflict and lets you deselect the problematic lines quickly.
Making an edit
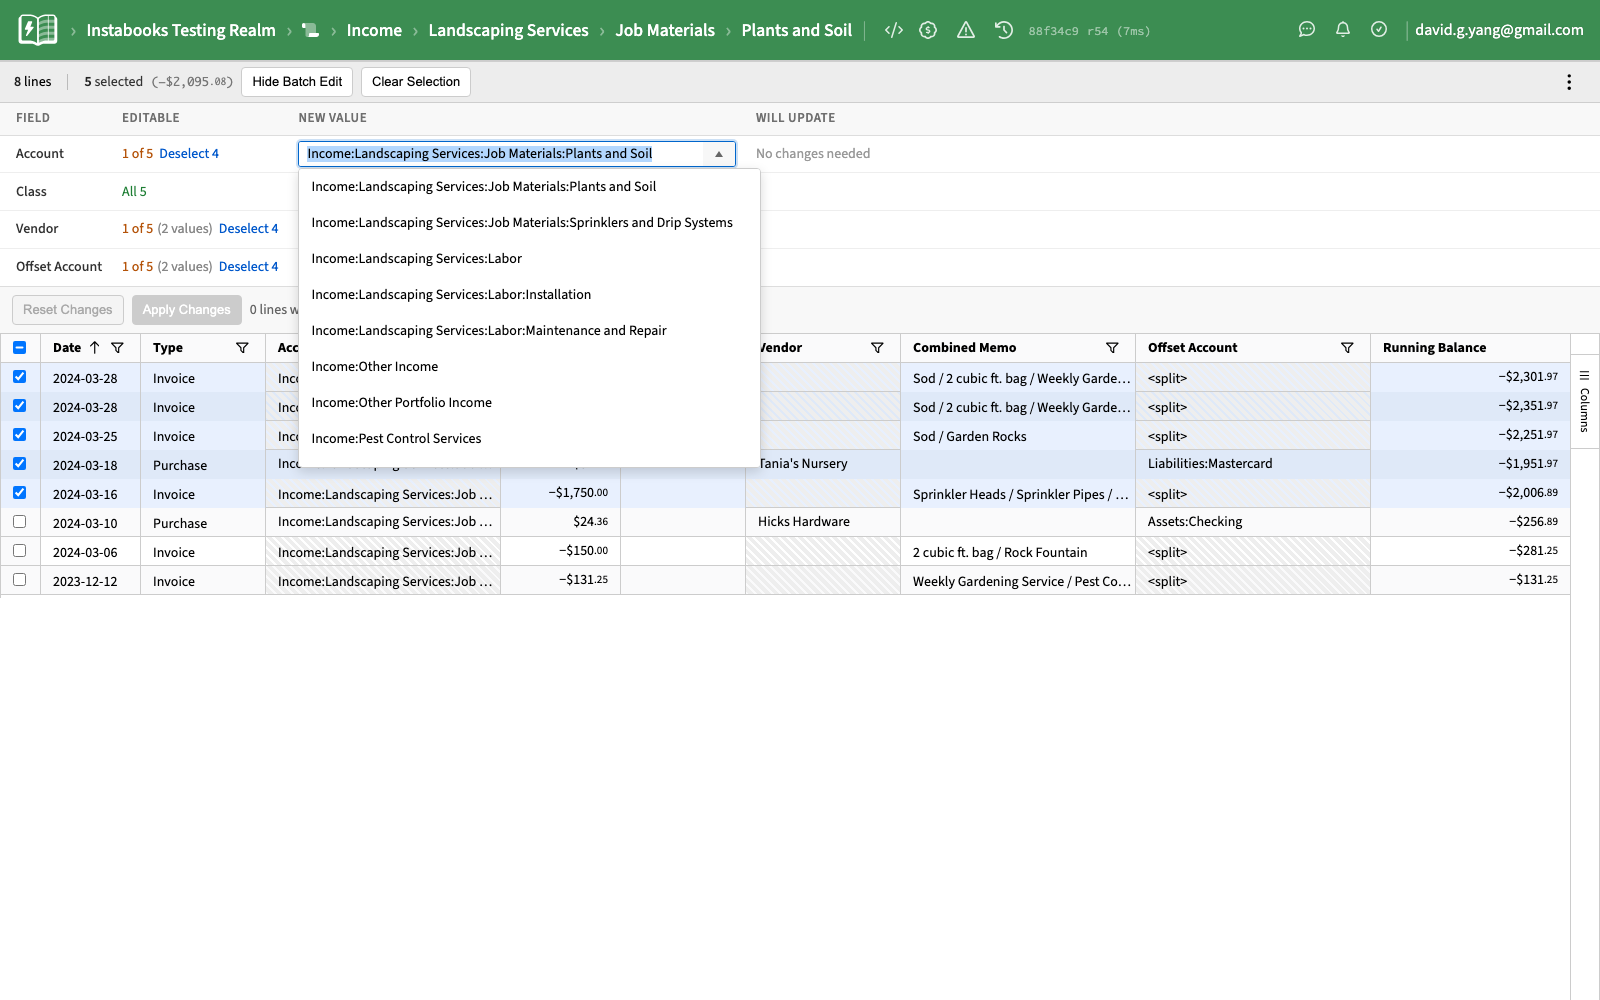
As long as there are no problematic selections, you can make an edit. Click into the field for the property you want to change — for example, Account — and pick a new value from the autocomplete dropdown. Review the staged change, then click Apply Changes.
Even hundreds of edits should only take a few seconds. If anything goes wrong, you'll see the issue reported at the top of the screen.
You're now well versed in the Instabooks features that make batch reclassification of QuickBooks Online transactions a breeze.